Installing Latent Agent
Windows requires WSL
Latent Agent supports macOS, Linux, and Windows.
Windows users should install and use Windows Subsystem for Linux (WSL).
1. Retrieve LEIP license key
Navigate to https://accounts.latentai.io/sign-up to create a new account. After you verify your email address, we'll email you a one-year trial license key.
2. Set LEIP license key
Complete this step before launching Visual Studio Code
If VS Code is already running, you'll need to close it and relaunch after completing this step.
After you receive your license key via email, place it in the following location on your development machine (the machine where you'll install and run Latent Agent): ~/.leip/license.key. If you'd like, you can replace <your-license-key> and run the following command:
mkdir -p ~/.leip && echo "<your-license-key>" > ~/.leip/license.keyAlternative License Key Configurations
The above instructions are the best way to ensure multiple processes have access to your license key. If you prefer, however, you can set the LEIP_LICENSE_KEY as an environment variable. You can also place the license key in your present working directory: $(pwd)/.leip/license.key.
License keys on target devices
On your target machine (the machine that will run inference), assign your license key to the LEIP_LICENSE_KEY environment variable:
export LEIP_LICENSE_KEY=<your-license-key>3. Install the Roo Code extension in VS Code
If you haven't already, download and install Visual Studio Code. Then, open a new window, select the Extensions tab from the Activity Bar on the left side of the VS Code window, and search for Roo Code. Install the Roo Code extension.
4. Configure the Roo Code extension in VS Code
Deactivate streaming
Due to a known issue, streaming is not currently supported. Please confirm the "Enable Streaming" box is unchecked.
The Roo Code extension should now be visible on the Activity Bar. Click on the Roo Code icon and then the gear icon to open the configuration settings in the Primary Sidebar on the left side of your window. Enter the following settings:
- API Provider: OpenAI Compatible
- Base URL:
https://chat.latentai.io- API Key: Enter your LEIP License Key
- Model:
Latent Agent- Select "Enable Prompt Caching"
Be sure to save these settings. When completed, your Roo Code Settings should look like this:
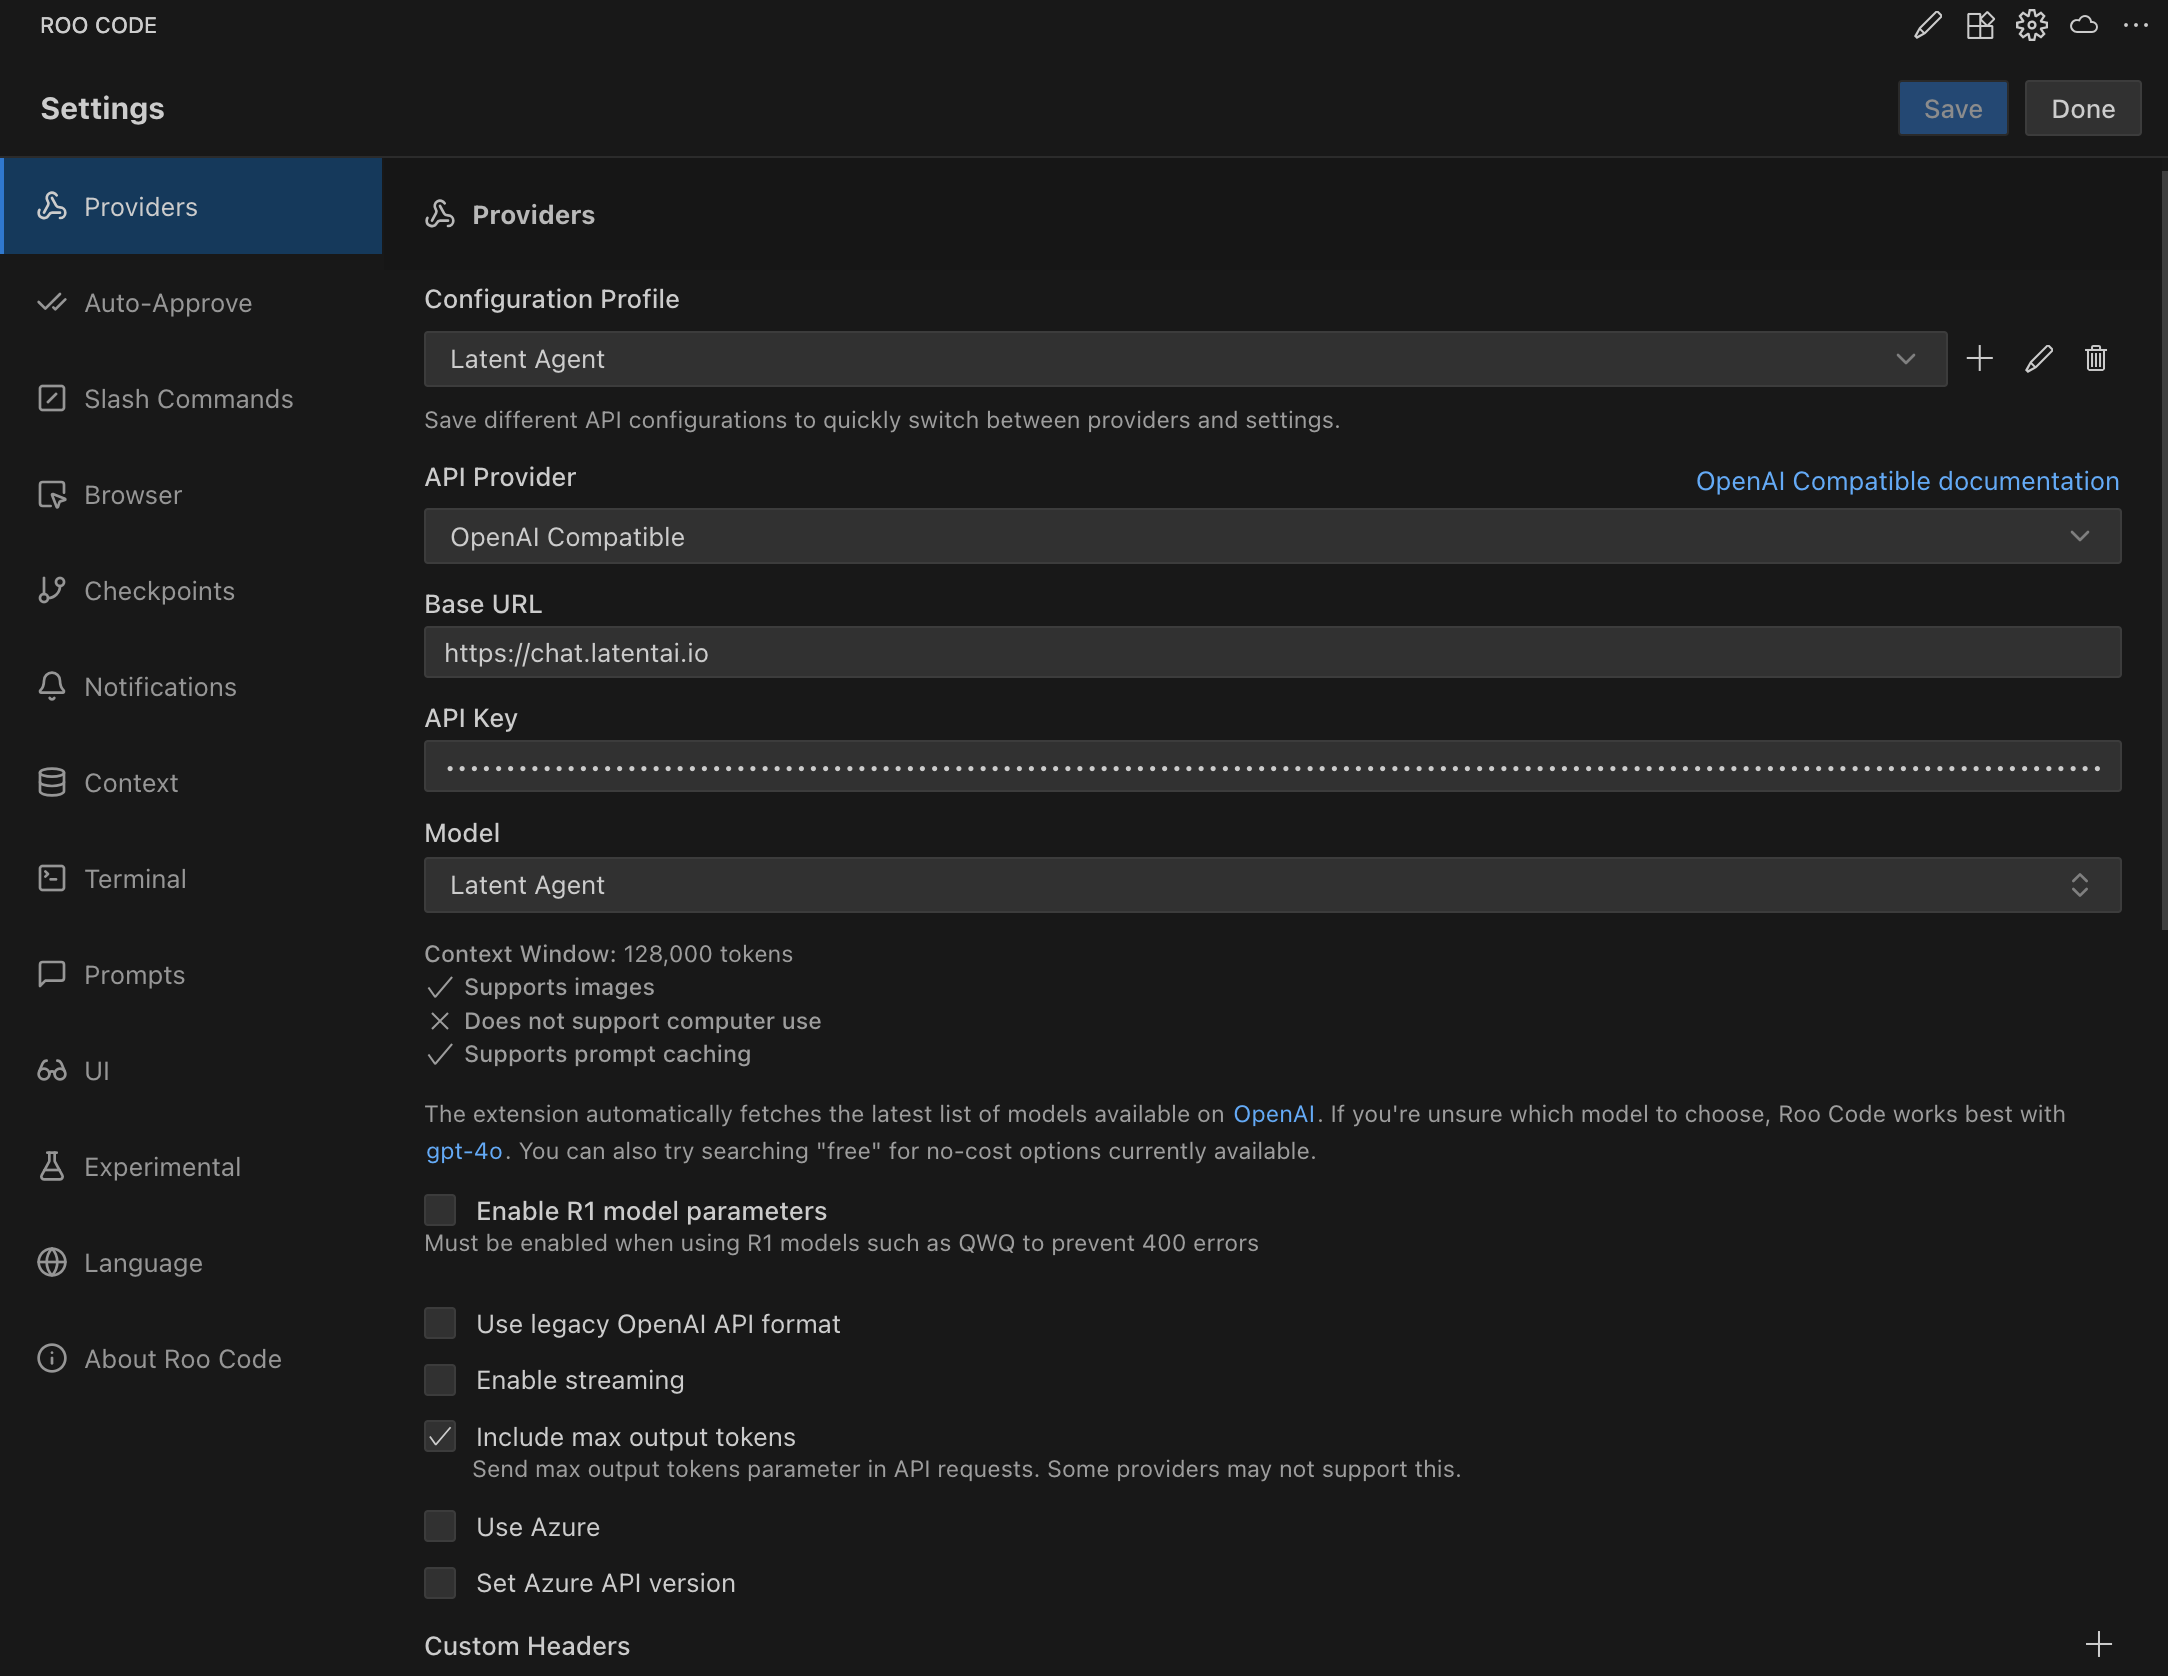
Configuration Profile
Save your Latent Agent configuration settings by clicking "Add Profile" in the Roo Code Settings menu.
5. Install the Latent Agent Model Context Protocol (MCP)
Create and Activate a Python Virtual Environment
We recommend creating and activating a Python virtual environment with Python 3.10. For example:
python3.10 -m venv .venv && source .venv/bin/activateTo install the Latent Agent MCP, run the following command:
pip install latent-agent --extra-index-url https://packages.latentai.io/pypi/public/simpleTo initialize Latent Agent, replace path/to/workspace with the absolute or relative path to your VS Code workspace root and run the following command:
latent-agent init /path/to/workspaceVS Code workspace root
The VSCode workspace root is the top-level folder that VSCode uses as the starting point for your project. It's where:
- Your project files live
- VSCode looks for configuration files
- Relative paths in the terminal and editor are resolved
- Roo Code looks for its project-level modes and MCPs (
.roo/folder)
If you open a folder in VSCode, that folder becomes the workspace root.
Finally, either relaunch or reload VS Code and use the Command Palette to select your virtual environment as the Python interpreter.
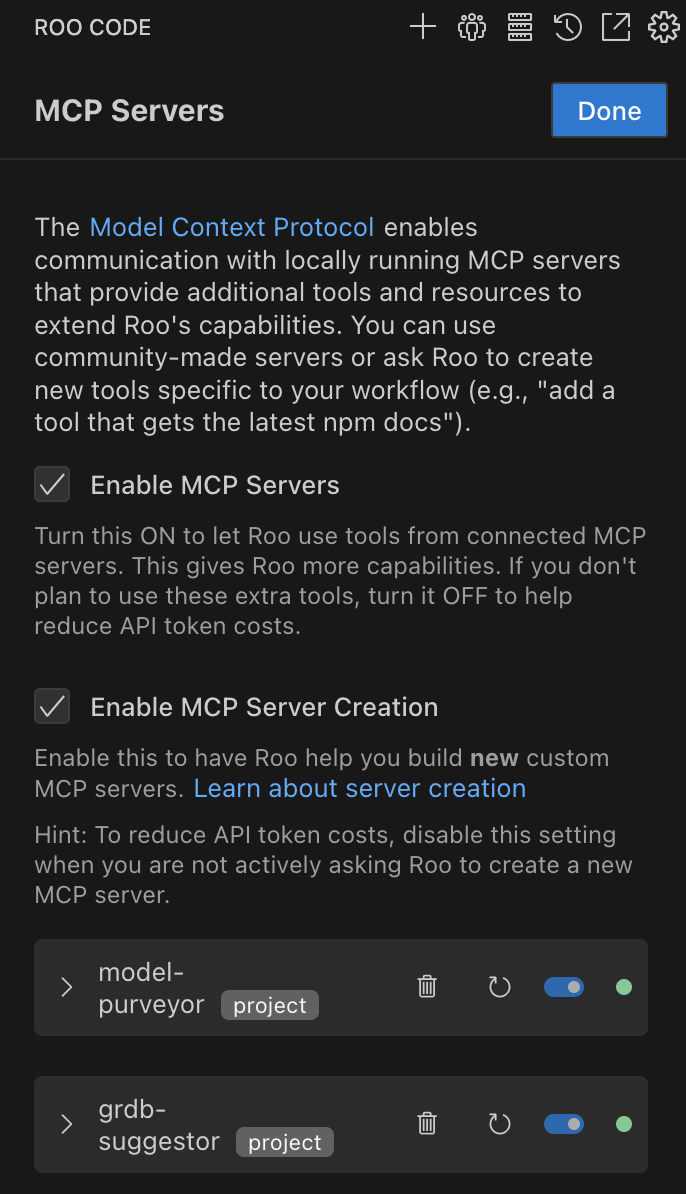
6. Verify installation
Under the MCP Servers tab, you should see model-purveyor and grdb-suggester.
7. Upgrade Latent Agent
To upgrade to the latest version, activate your Python virtual environment and run:
pip install --upgrade --force-reinstall latent-agent --extra-index-url https://packages.latentai.io/pypi/public/simpleThen, activate Latent Agent as usual:
latent-agent init /path/to/workspaceUpgrade in the same workspace
When you upgrade, make sure you're using the same workspace root where Latent Agent was previously installed.
Contact us
Having trouble? Visit our help desk.